Need help with ICT Coursework?

Here is an example of some coursework which describes the different properties of bitmap and vector images. Read more here!

History being a jumble?

Click here if you would like to find more about Mussolini and the Abyssinian Crisis during the 1930s!

Need inspiration for Controlled Assessment?

If you would like to read about my experience with the DigCom controlled assessment, see my work, and look for inspiration, read this page!

Stuck with essay writing?

Read this page about my English Literature Controlled Assessmenr on 'The Merchant of Venice'. Pick up structure techniques and ideas!

Evaluations doing your head in?

Here, you will find my example of an ICT evaluation, comparing 2 different advertisements. Collect ideas for your design and graphics coursework!

Tuesday 5 November 2013

How to Start a World War - Hitler Style


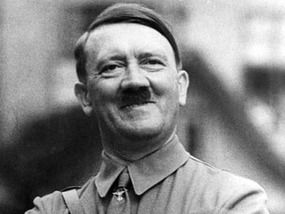
As you may know, Hitler was a politically obsessed man. He desired to make Germany and Austria unite into a great country, along the side of Britain, planning to destroy communism in the USSR. Growing up as a very disturbed individual with a strong character, he turned the Jews into scapegoats and killed millions..
Wanna know how to do that? Then this is the right post for you!

Step 1 - Become a Dictator

After the wall street crash, that had started in the 1920s, there was a worldwide depression. Although the idea of dictatorship may be seen as extremely wrong today, countries during 1933 didn't mind the concept if their dictator had promised jobs and a better economy. 
  • For example.. by 1938, there had already been a large population of Nazi supporters based in Austria. They had aided Hitler in his annexing. 
  • The Austrians had seen German economy improve after Hitler had come into power (as he had broken the Treaty of Versailles, and introduced conscription). They wanted him to lead their country as well in order to help their economy improve!
  • Benito Mussolini and Joseph Stalin were other dictators at the time. They had also become very powerful.

Step 2 - Come into power at the right time 

Hitler had chosen the perfect times to do everything:

  • As mentioned in step 2, people had supported dictators at the time due to their economic crises. This gave Hitler an excuse, a sense of acceptance and more opportunities.
  • Another reason as to why Hitler was able to annex Austria was because of his timing. The League of Nations was busy with trying to sort out the Abyssinian Crisis. This dispute had a higher priority, and therefore, Hitler wasn't taken as seriously as he should have been.
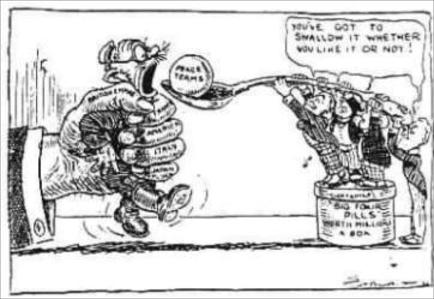
  • His actions came after the Treaty of Versailles. This had earned him a few points: appeasement. Britain had began to think that the treaty was too harsh.. and they let him get away with a few things.
(1933 is just about right)

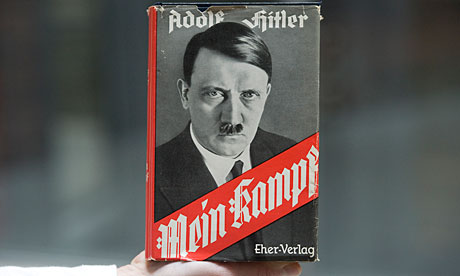
Step 3 - Propaganda! Propaganda! Propaganda!

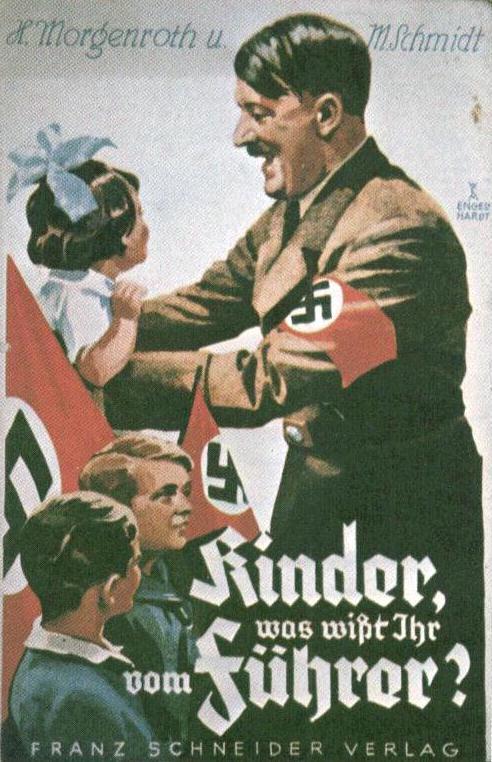
Hitler was a big user of propaganda. He used it to gain many supporters. 

However, on a more international level, he was a massive liar. For example.. 
  • When he had introduced conscription (which was not allowed according to the Treaty of Versailles) he had lied and said that he was very reluctant to do so.. when actually, he did do it to go against the treaty - one of his main aims.
  • To gain Czechoslovakia, he had lied to Italy, Britain & France about what he wanted. He kept increasing his demands.. and all of them were appeased.

Step 4 - Make Dictator Friends

Hitler became very good friends with Mussolini. Before they had been friends, invasion had been much more of a challenge for Hitler. In 1934, Mussolini had prevented his attempt to annex Austria, however after, he didn't do anything against him.

In fact, we can tell that he was very supportive of Hitler's actions. He had help Hitler organize the Munich Conference (which lead onto the invasion of Czechoslovakia). He had also destroyed Spain together with Hitler in the Spanish Civil War, and signed the Anti-Comintern Pact against the USSR (also with the Japanese dictator).

Making friends = doubling the power.

There.. That's it!

I hope this post will help you in world-denomination and your History GCSE exam!

Sunday 3 November 2013

Physics 2a - Remembering your Units!!

A big mistake made by students when they are trying to use formula triangles is that they always number crunch with the wrong units! Physics 2a is FILLED with formula triangles, and I felt that it was just important to make a post which would go through all of the units that you need to know. Read through the list, and try to familiarize or even remember them! ...

And here the list begins..

Time - secs
Speed - m/s
Force - N
Energy Transfer - J
Gravitational Potential Energy - J
Height - m
Kinetic Energy - J
Power - W or J/s
Momentum - kgm/s

Confused?

Read through my other blog posts to see the formula triangles in which these units are used..
Hopefully that will help :)

Thursday 31 October 2013

Physics 2a - Work Done

What is 'Work Done'?

The 'work done' is the same thing as 'energy transferred'. 

To do work, you must move something over a distance.. and to do this, you must have an object to move, a distance to move it over, and a force to move the object - this is the basis of doing work.

For example, work is done when you sweep with a broom: You have to provide a force; an effort to move the dirt over a distance. Energy is being transferred.

(Bear in mind that 'work done' is not always useful - it can be wasted.. especially as heat.)

Formula Triangle!


This is just a simple formula triangle. To find the 'work done', you must times the force by the distance. It is important to remember the units for the triangle. Examiners my try to trick you out by using cm or km instead of meters. Always remember to convert your units!

Let's go straight into an example...

Eg 1: A man pushes a car over a distance of 3m. The man pushes the car with a force of 500N. Find the amount of work done.
 
Work Done = Force x Distance
Work Done = 500 x 3
500 x 3 = 1500J

It's very easy! But let's now look at a more complicated example..

Eg 2: A professional weight-lifter pulls a heavy weight over 500cm with a force of 600N. Find the amount of energy transferred.

Key Notes:
  • The unit described here for distance is 500cm. You must convert this into meters.
  • Remember.. the "energy transferred" is the same as the "work done", so this question is still asking for the work done even though the wording might be a little different.
Work Done = Force x Distance
Work Done = 600 x 5
600 x 5 = 3000J

Physics 2a - Resultant Forces

What is a Resultant Force?

Forces always come in pairs. If you have one force, there will always be another opposing it; on the same line. For example, gravity's opposing force is the reaction force.

The resultant force is the calculated overall force from to opposing forces. To calculate resultant forces, you must add or subtract the two opposing forces from each other. By doing this, you will get ONE simplified force from the TWO forces.

Let's explain this further...

How to Calculate Resultant Forces?

Let's look at the car on the left. 

  • The car has a a driving force 1500N, right.
  • Air resistance act against the car, 700N left.

These two forces are opposing, one is on the right and the other, on the left (not up and left, or down and right). This means we can calculate a resultant force; a simplified version of the two original forces.

1500N right - 700N left = 800N right

By subtracting the forces, we have found out the resultant force. It is essential to understand that whether you draw the forces 1500N right and 700N left, it will be the same as 800N right.. They are the same thing!!


Let's look again at the example with the book on a table.

  • The weight of the book is 50N.
  • The reaction force acting on the book is also 50N.

The forces are opposing. One force acts downwards (gravity) and the other against it, upwards (reaction force). However, the forces are equal. Let's see what happens if we minus them from each other...

50N up - 50N down = 0N

There is no resultant force; A ZERO RESULTANT

What do Resultant Forces do?

If there is a resultant force in the mix, then that means there will be a CHANGE IN VELOCITY. Try and remember these 4 main rules to the effect of resultant forces!
  1. If the object is STATIONARY, and there is NO resultant force then the object will stay STATIONARY.
  2. If the object is STATIONARY and there IS a resultant force, then the object will ACCELERATE in the direction of the resultant force.
  3. If the object is MOVING, and there is NO resultant force, then the object will carry on moving at a STEADY SPEED ( - it will not stop!!)
  4. If the object is MOVING, and there IS a resultant force, then the object will either ACCELERATE or DECELERATE
Remember point 3! An object does not need a resultant force to make it move. Resultant forces only cause changes in velocity, whether an objecy was originally moving or not. 

If no resultant forces are acting on a moving object, it would be able to move forever (just like in space). However, on Earth, frictional forces will (in most cases) appear.. which explains why objects can't move forever. 

Wednesday 30 October 2013

5 Tips for Memorizing (the Mark's Gospel)


To be able to get the best grades in the Mark's Gospel exam, you must be able to retell passages, which can be a really time consuming and tedious process. From my experience, I know that it can be extremely frustrating.. so I am going to give you some tips as to how you can conquer this mighty challenge!!

1. Be motivated!

I know how boring learning the Gospel can be.. but you have to try and see the bright side of it all. Think to yourself, 'Why am I doing this?' and see what answers you can come up with. Is it because you want to strengthen your faith? Do you want to get good results so that you will have better opportunities in the future?

If you're feeling super unmotivated, write these reasons down on a piece of paper, and reflect on them any other time you feel so too.

Wanting to learn and wanting to memorize is what is going to help your memorization become a better experience.

2. Learn it over a longer period of time..

Often, I had relied on the 'leave it until the last day and then cram it in then' technique.

This is a trap! It is not the best way to learn, especially when trying to memorize the Mark's Gospel. You would be a superhero if you left it to the last day and did not fall asleep after your first passage.

Planning for your exam may mean learning each passage 4 - 5 times. The first time learning will be a long and not very enticing process.. It takes time for your brain to consume all of the content.. but bear with it! You will find that when the challenge comes the second time around, it will be easy! .. So don't leave it for the last day!

3. Use a more logical method..

Have you ever thought about how you learn your passages? Everyone for some reason seems to believe that reading the passage over and over will miraculously encode the sentences into their heads, but no.. things just don't work that way.

It's proven that if you try to remember; try to make connections in your brain you will remember things faster and more efficiently. 

So here is the method that I propose to you!..
..Let's try to memorize the first verse of Mark's Gospel which reads...
This is the Good News about Jesus Christ, the Son of God.
Now, we are going to take the first letter of every single word and write it down so that it will look like this...
T I T G N A J C T S O G. 
Try and read that without looking at the original verse (no cheating!). You want to try to prevent, as much as possible, yourself from looking back at what you are trying to remember. Can you feel your brain erupting with connections? Easy, right? Now try it with a whole passage..

4. Pay attention in lessons..

To be able to do the method specified in tip number 3, you will need to be familiar with the passages that you are trying to memorize. This requires you to listen in your lessons! It's not that hard, once you think about it.

However, if for some reason this doesn't seem to work, and every time you try to memorize, you just go blank.. then try recording the passage on your phone.. listen to it a few times.. and then try again!

5. Make memorizing fun!

I know it's boring. I know watching videos on YouTube is much more fun.. but look & find even more ways to learn them.
You like hanging out with friends? Make a revision group and test each other.
You like drawing? Draw a storyboard for the passage, then see how much you can remember it!

Good Luck!! :D

The Importance of Jesus' Suffering, Death & Ressurection

For the Mark's Gospel GCSE, you will need to be able to answer Evaluation Questions. If you click the massive PDF link below, you will be lead to a page where you can read notes and about the significance of all passages from Chapter 11 onwards! Making this certainly helped me have more ideas when answering evaluation questions ~ READ IT!!! :)


Tuesday 29 October 2013

An Introduction to the League of Nations


Why was the League of Nations created?

Before WW1, the alliance system was in place which divided Europe into 2 main alliances: The Triple Entente and the Central Powers. These alliances were where the main powers had agreed to have each other's backs, meaning that if one of the countries were in the midst of a dispute, the entire alliance would have to come in to help sort it out.

However, the alliance system had led to WW1. After the murder of Duke Franz Ferdinand, a dispute of 2 countries had led to the dispute of the entire world. 

After WW1, the League was made in the Paris Peace Conference to act as an international police in the place of an alliance system for all the countries. The idea was made by Woodrow Wilson, however, he was not a part of it which were on of the reasons for its failure.

The League's Aims

The League of Nations had 4 main aims:
  1. To discourage aggression from any nation
  2. To encourage countries to co-operate, especially in business and trade
  3. To encourage nations to disarm
  4. To improve the living and working conditions of people in all parts of the world.
Aims 1 & 3 were the most important of the 4 main aims, but the ones that weren't succeeded. The League's court of international justice tried to solve boarder disputes but they simply did not have power. They could suggest ideas to try and solve the issue, but could never enforce or check whether what they had said had been done. The disarmament aim was a complete failure. Countries did not trust each other enough to disarm, and instead rearmed.

Aim 2 was not successful after the Wall Street Crash in which started in 1929. America, which was the main trading country, was forced to stop trading with certain countries which stirred up aggression - ie the Manchurian Crisis.

Aim 4 was partially successful. Although the League was unable to enforce ideas onto other countries, it was able to campaign and persuade other countries to carry out the League's ILO's (international labor organisation) recommendations. The ILO and League's commissions/committees were also able to take refugees back to their homelands, make working conditions safer, defeat dreaded diseases such as leprosy and free slaves.

How did the failures of the League of Nations contribute to WW2?


There were many things that the League was lacking which had led to its failure. Here, I will describe some reasons as to why Hitler disregarded the League, and why WW2 started.

The League did not have an army

Although Clemenceau, the leader of France, had said that the League should own it's own army, it did not. This was because Britain and other countries were selfish with their men. In the Paris Peace Conference, the leaders had come to decision that if a dispute was to happen, and a country had came to its 3rd warning, the central powers of the League were to send their own men on behalf of the league.

However, at the end of the day, Britain and France (the main leaders of the League) had their own interests and economies to worry about - they did not send their own men. For this reason, many boarder disputes, such as the dispute at Vilna - 1920, had ended unsolved. Hitler did not acknowledge the League as a proper enemy, but as weak, furthering his aggression.

The Geneva Protocol

The Geneva Protocol made the League look weak; it proved to Hitler that they were not worth recognizing as an enemy. There were two reasons to this:
  1. The Geneva Protocol was drawn up by Britain and France in 1924. It was designed to back up the League's decision. When it was made, it was to enforce what the League had said. It made the League look weak; it made the League look as though it couldn't do its own job by itself.
  2. Just before the Geneva Protocol was about to be signed, Britain had decided not to go through with it. They were afraid that the Protocol might end up making them do something against their interest. This made both Britain and the League look weak. Britain made themselves look unorganized, and as it was a main leader of the League, it made the League look unorganized.

The Manchurian & Abyssinian Crisis

In both crises, the aggressor had gone against the League and gotten away with it. This is what originally gave Hitler the idea of also going against the League. The crises had been the final proof that the Leage was weak.

Hitler's Motives


Hitler had published all of his motives publicly, to the world, in 'Mein Kampf' - the book that he had wrote while he was in prison. He published this book in 1924, however, between 1933 and 1939, his plans came to life. 

Funfact :3 : In most books, 'the' is the most used word, however in 'Mein Kampf', the most used word was 'Jew'

Here were Hitler's 3 main motives:

Defeat Communism!

Hitler was completely anti-Communist. He had hoped to go to war with the Soviet Union in order to colonize them, and turn them anti-Communist too. He had believe that the first world war and the treaty of Versailles were as a result of the Bolsheviks. The propaganda in 'Mein Kampf' boldy points this out:
"Germany is the next objective of Bolshevism."

 Abolish the Treaty of Versailles!

Hitler absolutely despised 'The Treaty of Versailles' as it was a constant reminder of Germany's loses - he was a man obsessed with turning Germany and Austria (the country in where he was born) into great countries. He hated it so much that he called the leaders who had signed the treaty as 'November Criminals' despite how much they tried to avoid signing it. The treaty had made the country weak, and Hitler wanted to solve this.

Expanding German Territory!

As I had said before, Hitler was obsessed with trying to make Germany a great country. To most people's surprise, he had admired Britain and their navy, and aspired to be as great as them. Hitler aimed to unite with Austria, and to take back the countries that he had lost in the treaty of Versailles. He aimed to make more 'Lebenstraum' (living space) for the German people.

The Treaty of Neuilly, 1919 - Bulgaria


File:Flag of Bulgaria.svgThe Treaty of Neuilly is an easy treaty to learn as it didn't have many terms. Bulgaria played only a small part in WW1, and therefore wasn't treated very harshly. However, they were still punished, and some land was taken away from them to help build the new countries etc.
To read about the other treaties, please click the following links:

TERMS:
  • Bulgaria is to lose parts of her own land to help create Yugoslavia.
  • She is to also give parts of her own land to Greece and Bulgaria
  • Bulgaria is to pay £100million reparations from WW1
  • Bulgaria is allowed no more than 20,000 men in its armed forces
MORE INFORMATION:
  • Although this treaty was not as harsh as the other treaties created in the Paris Peace Conference, it still had Bulgarians that were part of its former population being governed by foreign powers.


The Treaty of Sèvres, 1920 - Turkey

The Treaty of Sèvres failed. It was a harsh treaty made for Turkey. Turkey was a tricky country to deal with. It's position on the map was very valuable as it could control the straits running in the Black Sea. This treaty considered to equal  the harshness of the treaty of Versailles


TERMS:

  • Turkey was to give Smyrna to Greece.
  • Syria, Egypt, Tunisia and Morocco were to become mandates under the protection and control of Britain and France.
  • A cap of 50,000 soldiers, seven sailboats and six torpedo boats was made for Turkey's army
MORE INFORMATION:

  1. The Turks were outraged by the harshness of the treaty. 
  2. Mustafa Kemal and the nationalists riskily decided to protest against the treaty. By force, they drove the Greeks in Smyrna that had moved there after the treaty.
  3. The TREATY OF LAUSANNE was created in 1923 which allowed Turkey to have Smyrna back. 
  4. The reason why this treaty was allowed, and why Turkey was so furious was because they were punished much more than they deserved; they did not deserve to be punished as harshly as Germany. It was a suspicious treaty: Britain and France could have made it harsh for self interest, for the reason of increasing their own empire.

The Treaty of Trianon, 1920 - Hungary


With the new sketches that were created for Europe, Austria-Hungary was split into Austria and Hungary. There was one new treaty for each country. The treaty that dealt with Austria was 'The Treaty of St. Germain'.

In this post, I will be talking about the treaty that dealt with Hungary: 'The Treaty of Trianon'

The Treaty of Trianon, 1920

TERMS:
  • Transylvania and other former Hungarian territories to be taken from Hungary and to be given to Romania.
  • Slovakia and Ruthenia to also be taken and given to create the new country Czechoslovakia.
  • Slovenia and Croatia is also to be taken from Hungary and given to create the new state Yugoslavia.
  • Pay reparations.
MORE INFORMATION:
  • Hungary ended up losing a substantial amount of its territory and population (3million Hungarians were forced to become part of a different country).
  • Hungary could not pay the reparations as their economy was so weak.

The Treaty of St. Germain, 1919 - Austria

After WW1, the fate of Germany's allies were also discussed at the Paris Peace Conference. A strong ally of Germany throughout the first world war was Austria-Hungary. However, this country collapsed in 1918 due to the treaties. Britain, France, America and Italy redrew the European maps. As part of the new sketches for Europe, Austria-Hungary was split into 2 countries. Up until today, we still know them as Austria and Hungary. In this post, I will discuss the treaty that was made for Austria. To read about the treaty that dealt with Hungary, please click here.

Treaty of St. Germain, 1919 

TERMS: 
  • Bohemia and Moravia were to be taken away from Austria, and to be given to the new country Czechoslovakia.
  • Bosnia, Herzegovina and Croatia were also to be taken away from Austria and to be given to the new country Yugoslavia.
  • Galicia to be give to Poland.
  • Parts of Austria to be given to Italy
  • Forbidden to unite with Germany
  • Army restricted to 30,000 men.
  • Pay reparations.
MORE INFORMATION:
  • The Treaty of St. Germain weren't made solely to punish Austria, but to sort out the new sketches that were made for Europe.
  • This treaty can be considered harsher than the treaty of Versailles as Austria's own land was given away; there were Austrians who were now made to be part of a different state. 
  • Austria had suffered sever economic issues after the first world war as most of their industrial areas were given away to Czechoslovakia.

The German Reaction to the Treaty of Versailles

The Germans were disgusted at the terms of 'The Treaty of Versailles'. Before WW1, all countries were waging for war, all believing that they would win. The German public were oblivious to the fact that they had lost. They thought that the German government had agreed to a 'ceasefire'. This lead even more to the shock of the terms to their treaty.. Germans were furious at having to accept such a harsh treaty without even the right to a comment. They refused to sign at first, but this meant for another war, and Germany, being a defeated country, had no chance of winning.
However, bear in mind the German treaty against Russia in 1918 (the Treaty of Brest-Litovsk) was much harsher.. so was this the right decision?

Let's look closer into their reactions at each term.

The Territory Term

Their main industrial areas were taken away from them, which left them with nothing industrially-wise. What was a major blow to their pride even more was the fact that Britain and France took German territories in Africa, Turkey and the Middle East for themselves.

The Reparations Term

German economy was already at a loss. They were afraid that this would destroy them even further.. and it did with hyperinflation where the cost of even bread raised to over the price of a house.

The Term for Disarmament

Woodrow Wilson, the leader of America, had aimed to make all countries disarm, but this didn't happen due to the lack of international trust. This resulted in Germany being the only vulnerable country. They only had a tiny army for a country that was quite large. Before signing the treaty, they had tried to protest by sinking it's own ship, but they had to sign it reluctantly

The War Guilt Clause

The Germans were furious with Clause 231. As I said before, they thought that the German governments had agreed to 'ceasefire'.. so why were they being treated like a defeated country? This clause didn't lead to peace but a growing vengeful attitude in Germany, which leads on to Hitler and the Nazis.

The League of Nations to be set up..

Germany felt insulted that they weren't permitted to enter the League. They had aspired to be a powerful country but here, they were being the complete opposite. 
After the League had taken their countries as mandates, they became even more upset.

What do you think?

There is no right answer to the question "Was the treaty of Versailles fair?" but there are many sources which can be argued for either opinion. 

People may think that it was fair as it was proven that if Germany won, they would have made an even harsher treaty. It was also proven that Germany were so confident they'd win the war, that they did not even save money to pay for their own reparations, but planned for the defeated countries to (which is why their economy was so bad).

Alternatively, other people may think that it wasn't fair. A British cartoonist had predicted, at the time, that the treaty would lead to another world war in 20 years- and guess what? - He was out by 1 year!!


The Terms of the Treaty of Versailles 1919


In 'The Treaty of Versailles' of 1919, there were 5 main controversial terms. You can remember these terms through the acronym:

T.R.A.W.L

1.  T - Territories & Colonies

  • Germany was now forbidden to join together with her former ally Austria. This was done to prevent them from becoming stronger and a threat to other countries quicker through Austria's help.
  • Germany's colonies became MANDATES. This meant that they would be given to the League of Nations (essentially Britain and France), and they would be given a PLEBISCITE (vote) after a certain amount of years as to who they wanted to belong to.
  • German overseas empires were taken away under the command of Britain. They had had an unfriendly relationship before the war as Britain felt they were in-charge of the seas.

2.  R - Reparations

  • The powers of the Paris Peace Conference had decided the Germany was to pay £6,600million worth reparations!
  • This was finally decided in 1921.
  • It meant that Germany would still be paying until 1984!

3.  A - Armed Forces

  • Germany weren't allowed CONSCRIPTION.
  • The maximum amount of people allowed in the German army was 100,000 men.
  • The Rhineland became a demilitarized zone - this was done for the protection of Alsace-Lorraine and France.
  • Germany weren't allowed to own air-crafts, armored vehicles or submarines. They were only allowed to have 6 battleships in their navy.

3.  W - War Guilt Clause

  • Clause 231 was the most hated clause by Germany, for pride's sake.
  • It stated that Germany was solely the cause of WW1.
  • Germany didn't even have a say in any of the terms, including this one.

3.  L - League of Nations

  • The League of Nations was to be set up!
  • Germany was not allowed to join this justice-making structure until it proved that it turned over a new leaf, and was good - what a pity .. (extreme sarcasm)

Monday 28 October 2013

Physics 2a - Weight, Mass & Gravity

What is Gravity?

  • Gravity is the force of attraction between all masses, which can be seen on big scales. For example, our solar system is held together my gravity. Also, blackholes are a GREAT example and source of gravity.
  • Gravity can be seen through the way that things accelerate towards the ground. If you throw a ball up in the air, it will fall back down to the floor and accelerate.
  • Gravity changes in different places around the universe. On Earth, g = 9.8N but scientists round this number to 10N as it is easier to use in calculations. In space, g = 0N .
  • Gravity gives everything a weight.

What is Weight and Mass?

  • Weight and mass are NOT the same thing.
  • The mass of an object is the stuff that it is.
  • The weight of an object is the mass being pulled by gravity.
  • As there are different gravitational forces around the universe, your WEIGHT can change if you go to a different plant, but your MASS won't.
  • Mass is measured in kg.
  • Weight is measures in N.

Calculating Weight, Mass or Gravity


This is probably one of the easiest formula triangles out there. All you need to bear in mind are the units - Gravity is N/kg! Let's go straight to an example:

Eg: Calculate the weight of G-Dragon (my music crush >.<) on the moon, where gravity is 1.6N/kg and on the Earth, where gravity is 10N/kg if G-Dragon's mass is 60kg.

On Earth:
Weight = Mass x Gravitational Field Strength
Weight = 60 x 10 = 600N

On the Moon:
Weight = Mass x Gravitational Field Strength
Weight = 60 x 1.6 = 96N


Creating your own Digital Text

Unit 3 of digital communications is a series of controlled assessments.
  • Section A -> Writing your proposal for your digital text
  • Section B -> Create your own digital text
  • Section C -> Evaluate your created digital text
Below, I have inserted my Section B. Due to time constraints and the lack of professional equipment/actors etc, there are a few .. lets say .. hiccups but this was acknowledged and I ended up with a whopping full marks :D 
The story isn't true. The campaign was made up. I wasn't bullied, but please do support those who are bullied. Researching for this project did touch me at points. (And yeah, I do look so young here haha - YR9)
Update: Damn, seems like the video doesn't work. I guess you can just watch the flashing photos for inspiration.. haha

Choices..

The question stated that I could choose any form of digital text. It then gave me a list of purposes and I chose 'to promote a campaign against bullying for secondary school students' as it seemed easy. The digital text I created was film... which I later learned was the WRONG text to choose!!!!!

My experience and advice..

I have a lot of experience in making videos for other projects, and I admit, it is quite fun. 
  1. I started by RESEARCHING! Research is the key to everything. Research other works that have the same or similar purpose to your own. Record techniques that you found were good and try to use and adapt them for your own.
  2. Then I created a basic plot for my video. This consisted of a beginning, middle and end. If you are doing a website or blog, make a list of pages or posts you would like to cover. If you are making a podcast, write down different types of people you would like to interview etc.
  3. After that, I went crazy story-boarding. I sketched about 20 pages worth shots, notes, diagetic &non-diagetic sound etc. If you are doing other digital texts, repeat step 2 but go into more detail. For example, if you are doing a blog, draft your posts for you are ready for your timed writing.
  4. This step was surprisingly the most torturous. Since I was alone, I had to ask friends and family to help me film after school. I couldn't do all the shots I wanted to do because time was of the essence, and they had their own controlled assessments to plan for.. which is why you should not do a video!!
  5. I edited my shots in the control assessment time :)

Tips for your Controlled Assessment!

  • Come prepared - draft, plan, film your shots. You want to come in knowing what you are doing because you only have 20hrs. In the room, you don't want to think, but do!
  • Research - research is the only thing that will get you your C- A*s. It is what the examiner is looking for.
  • Don't just do something because it looks pretty -  Make well thought-out decisions in preparation for Section C (you don't want to repeat Section A)
  • Choose your brief and form of digital text wisely ;) - Research each one prior to making a final decision!

Physics 2a - Acceleration Formula Triangle


Here, is the acceleration formula triangle. It's like any other formula triangle except for the '(v-u)' bit at the top. Instead of simply entering a value, you have to work out a CHANGE IN VELOCITY. 'v' stands for the initial velocity and 'u' stands form the final velocity. You have to take away u from v which will give you this change in velocity. 

Let's look at some examples...
Use the formula triangle to find what equation you need to use.

Eg1: A man accelerates from 2m/s to 5m/s in 3 seconds. Find its acceleration.

Acceleration = Change in velocity ÷ Time
Acceleration = (5-2) ÷ 3
Acceleration = 3 ÷ 3
Acceleration = 1m/s²


Eg2: A car accelerates from 50m/s to 70m/s in 25 seconds. Find its acceleration.

Acceleration = Change in velocity ÷ Time
Acceleration = (70-50) ÷ 25
Acceleration = 20 ÷ 25
Acceleration = 0.8m/s²

Tips:

  • Remember that the unit for acceleration is m/s²!
  • Even if the initial velocity is 0, remember to scribble it down while number crunching so you don't end up confusing yourself

Physics 2a - Velocity-Time Graphs

In an earlier post, I talked about distance-time graphs, which was one of the types of graphs you needed to know for the further science exam. You can read more about that type of graph if you click here! Here, I will talk about the other way to describe and object's journey: the velocity-time graph!

How to Read Velocity-Time Graphs

This type of graph is very similar to the distance-time graph except that the Y-axis is the velocity (m/s). You may notice that the unit is the same as the unit for speed. This is true! Both SPEED and VELOCITY measure how fast something is going. The only difference is that VELOCITY has a direction in addition to a value. For example, where a speed might be 50mph, the velocity could be 50mph west.

Below is an example of a velocity-time graph. Let's look at how to read it.

The graph has been split into 5 sections. By doing this, we can explain what the different parts mean.
If you get confused with the descriptions at any point, just like last time, imagine the object to be a car :D

A: Straight + Positive Correlation = ACCELERATION
Unlike distance-time graphs, if the line has a positive correlation, it shows us that the the velocity is increasing. This is unlike the distance-time graph where it meant that the object is traveling at a steady speed - don't get mixed up!

B & D: Straight + Flat = STEADY SPEED
If the line is flat, then it means that all parts of the line are at the same velocity; you are always at the same speed; you are at a steady speed! If we look at line B on the graph, we can tell that the object is traveling constantly at about 8m/s.

C: Curve + Positive Correlation = INCREASING ACCELERATION
This is still accelerating as we can tell from the fact that the line has a positive correlation; the velocity is increasing. However, this time it is a curve which means that the rate of acceleration is not constant/directly proportional, but increasing/decreasing (over-curves are decreasing but under-curves are increasing).

E: Straight + Negative Correlation = DECELERATING 
This time, the line has a negative correlation which means that the object is decelerating. If we follow different points of the line across to the Y-axis, we will see that the velocity is decreasing, proving that the object is decelerating.

How to Find the Distance

To find the distance traveled, you must calculate the area under the graph. You can do this using simple geometry skills. 

Eg: Find the distance traveled in the first 20secs.
(using the graph above)

Area = 1/2 x base x height
Area = 1/2 x 20 x 8
1/2 x 20 x 8 = 80m


The Abyssinian Crisis + Summary of the League of Nations


This was one of my assignments for history. I had to create a presentation and then present it to the class on the topic I was given. I earned a top mark, so I thought that it could help others. I've inserted the prezi down below. Feel free to read it! 

If the embedding doesn't work, then please click here!

Physics 2a - Distance-Time Graphs

There are two different graphs which can be used to describe how an object travels. For Physics 2a, you need to be able to know the difference between them, and how to read them. The first type is a Distance-Time Graph :D

How to Read Distance-Time Graphs

Distance-Time Graphs are very easy to understand. The X-axis represents the time (secs) and the Y-axis represents the distance. Below is an example of a distance-time graph:
The graph has been split into 5 sections. By doing this, we can explain what the different parts mean.
If you get confused with the descriptions at any point, imagine the object to be a car :)

A: Straight + Positive Correlation = STEADY SPEED
As you can see, the line is directly proportional. This shows us that it is going at a constant speed as the distance steadily increases in accordance to the time. The fact that the line is a positive correlation also tells us that the object that the graph describes is travelling forward; away from the original point (as the Y-axis, distance, represents the distance away from the original point. This is an advantage of distance-time graphs in comparison to velocity-time graphs: they can tell us in which direction the object is going :) Easy!

B: Under-curve + Positive Correlation = ACCELERATING
This line is positive which, just like line A, tells us that the object is travelling forward. It is however curved. Unlike, line A,  it is not directly proportional meaning that it is not a steady speed. Alternatively, if we break the line up further, we can see that it first of all travels slower.. but then the *gradient gets steeper and it travels faster! It accelerates!

C: Over-curve + Positive Correlation = DECELERATING 
This is just the opposite to line B. (Deceleration is the opposite to acceleration.) Again, if we break the line up, at first, it is steeper, but then it smooths out.. this tells as that the object is slowing down; decelerating.

D: Straight + Flat = STATIONARY
If the line is flat, this means that the object is stationary. This is because in any amount of time, the car has not traveled any distance; it hasn't moved.

E: Straight + Negative Correlation = STEADY SPEED 
This is similar to line A. Just like line A, this is straight, and so is directly proportional and travels at a steady speed. However, the distance seems to decrease. As we have established, the Y-axis, distance, describes the distance away from the original starting point.. So this means that the object is going back to that point; the distance away from that object is decreasing. ^o^

*Gradient = The line's gradient is its height ÷ length

How to Find the Speed

The distance-time graphs tells us 2 different pieces of information: the DISTANCE and TIME (surprisingly xD). 
Does that remind you of something? 
Of course. The distance-speed-time formula triangle!

You can work out the speed that the object is travelling by dividing the distance by the time; finding the gradient.


Eg: Find the speed that the object travels at during the last 20 seconds. 
(using the graph at the top of the page)

Using the triangle, find the values that you need and number crunch.
Distance traveled: -60m (as it is a negative correlation)
Time: 20secs (given in the question 90-70secs)

And so...  -60÷20=-3m/s